Professional Measurement: Thingamejig Scribing Tool
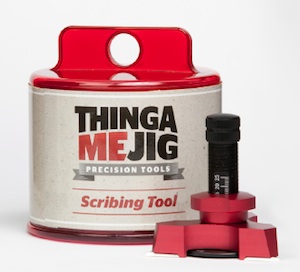
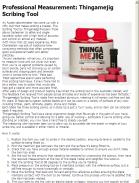
An Aussie cabinetmaker has come up with a nifty tool that makes scribing a breeze. The Scribing Tool by Thingamejig Precision Tools allows tradesmen to safely and single-handedly scribe with a high level of accuracy and control on almost any material.
With more than 22 years experience, Pete Chamberlain was sick of traditional time-consuming methods that often compromised good occupational health and safety practices.
“As any tradesman will tell you, it’s important to measure twice and cut once; but even then you’re up against problems caused by blunt pencils, pens not showing up on certain surfaces and chipping paint and laminate when it comes time to trim,” Pete said.
“Most apprentices spend years perfecting their scribing technique. I knew there had to be a better way to scribe that would also help get a cleaner and more accurate finish. After years of design and product testing I launched the scribing tool in the Australian market, and the feedback I’ve received from people across all trades and levels of experience has been fantastic.”
Thingamejig’s Scribing Tool is made from anodized aluminum, meaning it will remain rust-free and last for years. It features tungsten carbide blades so it can be used on a variety of surfaces of any color including timber, paint, laminate, plastic, stone and metals.
Each blade has three scribing points, so a sharp tip is just a ‘turn’ away, and an item can be retraced easily if required.
Thingamejig’s Scribing Tool has a clever ergonomic design that fits snugly in the palm of your hand, giving you better control and allowing for a safer way of working – particularly if you’re scribing while standing on a ladder, you now have a hand free to steady yourself.
The measuring ruler has been laser cut to allow you to accurately set the depth or height of your scribe line, and is available in either metric or imperial.
How it works:
How it works:
- Position the item you wish to scribe in the desired position, ensuring its level or parallel to the surface its being fitted to.
- Find the maximum gap between the item and the surface it’s being fitted to.
- Check that you have enough excess material available to remove to ensure you don’t make the item too small.
- Set the tool to the amount that needs to be removed by unscrewing the locknut, then have the required measurement at the top of the blade holder and retighten the locknut.
- Hold the Scribing Tool at 90 degrees to the surface you’re marking.
- Place pressure on the scribing tool so it maintains contact with the reference surface, but is still free enough to move horizontally or vertically.
- Move the Scribing Tool back and forward along the reference surface ensuring the blade maintains contact with the item to be marked. Continue this process until you’re satisfied that the item has been marked.
- Trim your item to the line with an electric planer or jigsaw, ensuring you trim exactly to that line.
- Place item in position to show the perfect fit.

